I didn't really know what to call this post. The recipe for this dessert is from a blog called Nutritionist in the Kitch and she rightly calls them Key Lime Tarts. But, when I was making this recipe I realised I pretty much had nothing in that the recipe called for. However, I did have a lot of things that I thought I could substitute. So, I thought, why not?! I like the idea of making up my own recipes and I suppose this is the place to start, learning to substitute! I didn't really realise that I couldn't call them key lime tarts until Alex come home and after telling him about my fun making them, he reminded me there is no lime in them. Oops.
Kiwi tarts makes me feel like I'm lying, because the only kiwi is what you see on top. I'm open to ideas here..
Find the original recipe here.
Orrrrrr, follow mine! Oo, exciting!!! Here goes..
Here's a nice picture to get you interested.
And here is your shopping list:
Crust:
1 cup shredded coconut
1 cup almonds*
1/2 cup sultanas*
1/3 cup honey
Filling:
1 1/2 avocados*
1 1/2 bananas*
1 lemon (juice & zest)
1/4 cup honey
4 teaspoons sweetener
Topping:
Kiwi or thinly sliced lime
*Notes:
- I made up a cup of almonds and a few hazelnuts, because I had some and I was feeling adventurous! I can't imagine it matters what nut you use to be honest
- Sultanas was where I really wished I had some dates! The original recipe states to use them to bind everything together, so I really recommend using these if you can! If you can use these, then you shouldn't need the honey
- Feel free to mix up the fruit ratios a bit if you don't want halves of fruit laying around. 2 avocados and 1 banana would work just as well
The recipe is super simple to do too.
- Blitz the dry ingredients for the crust together in a blender/food processor. Depending on how you like the crust you can either blend until a little crunchy (which I would recommend) or until almost smooth.
- Mix in the honey and pray it sticks together! It won't stick completely, but should be enough!
- Grease a 12 hole muffin tin (the deeper the better) and then divide the mixture, I put about 2 teaspoons in each hole.
- Blend together all the filling ingredients until thick and smooth and spoon on top of the bases. About 2 heaped teaspoons in there too. My tin wasn't as deep as I would have liked, so I just filled it to the rim, you can obviously make adjustments as necessary for your tin.
- Pop in the freezer and in around 60 minutes they'll be ready to eat!

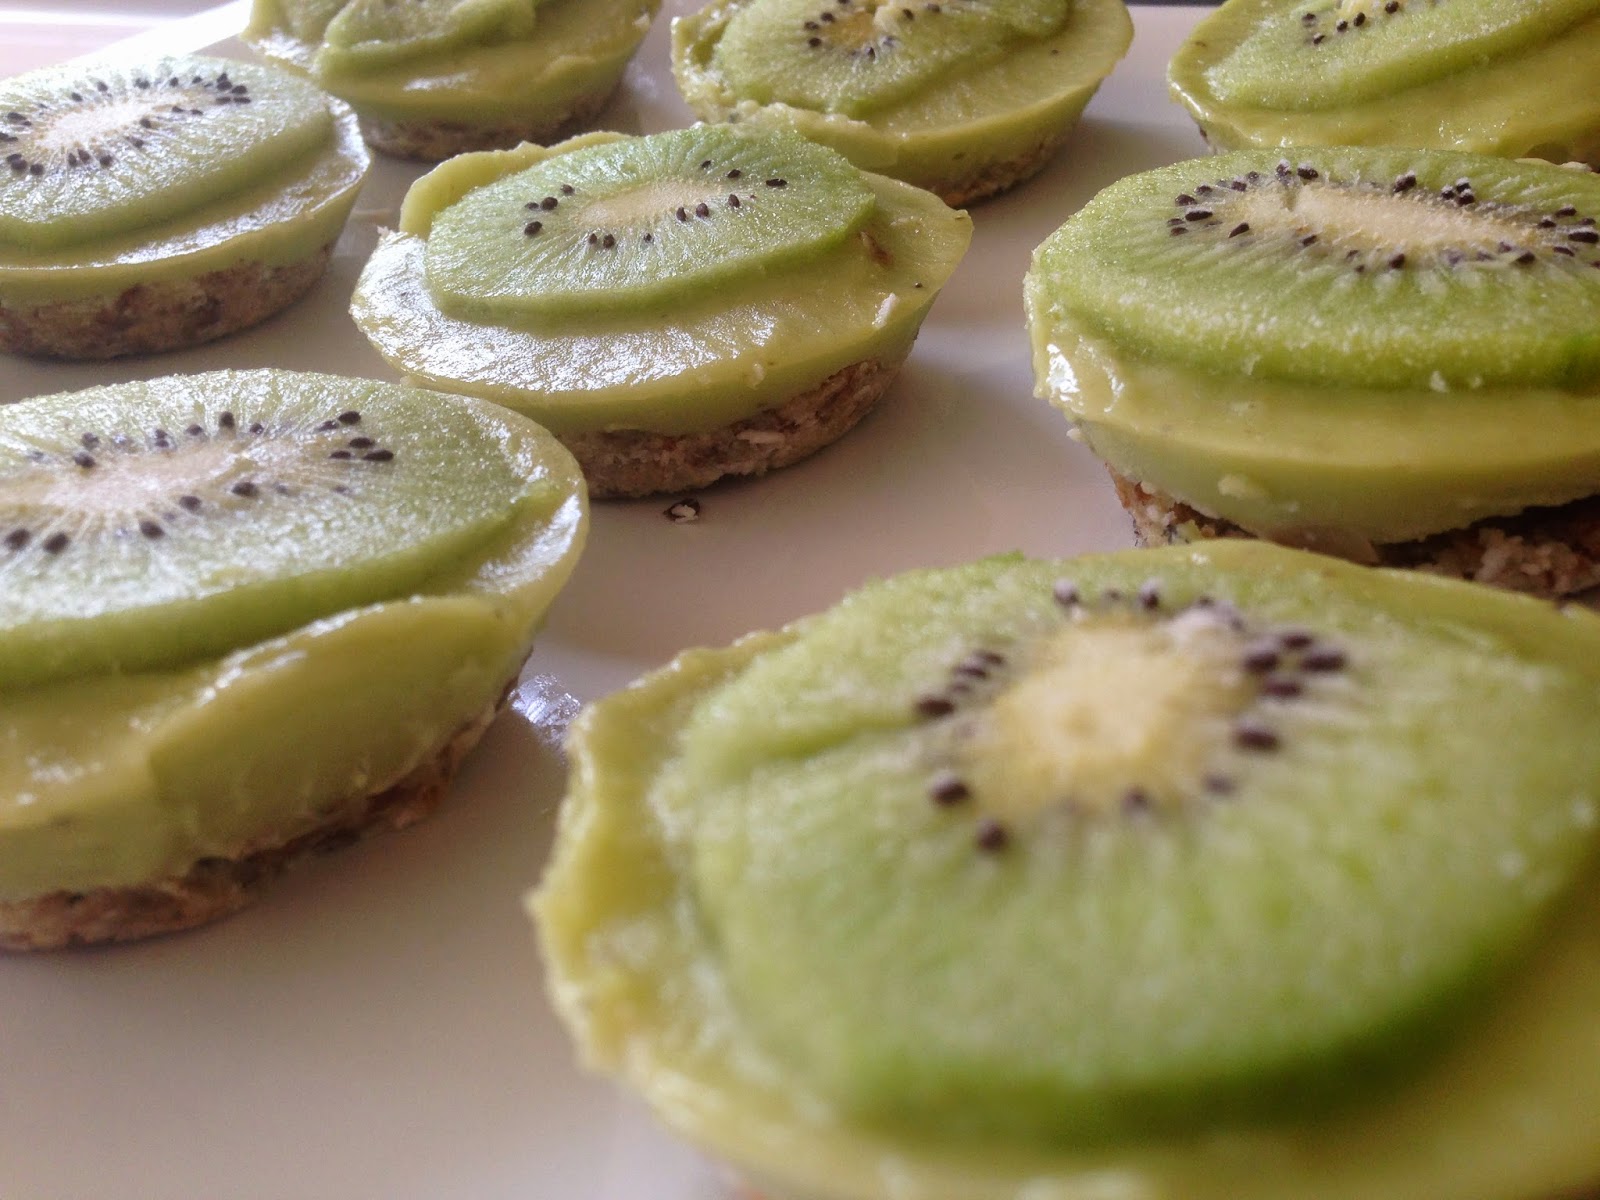
Look at these beauties!

And they look great in a stack.

Yuuuuuuum.
Definitely one to try! Do not be put off by the avocado either. I really don't like them, but have made so many great things with them recently. That's also why I added the banana, as I was super worried about the taste, but the banana flavour actually comes through more than the avocado! I can't speak highly enough of these and I am so happy that I managed to use my own ingredients and they still come out awesome.
No comments:
Post a Comment